Rules for harvesting mushrooms for future use: canning, salting and drying mushrooms at home
 If the year turned out to be fruitful, then the family will be provided with mushrooms for the entire season. And what to do with the gifts of the forest, which there is no longer any possibility to eat? Do not despair: if you do not want to lose your harvest, you can always prepare mushrooms for the winter in jars, barrels, tubs by salting or preservation, or simply dry them. Using these methods of harvesting mushrooms, you can feast on autumn supplies until next season.
How to prepare mushrooms for the winter: jars and other equipment
The first thing you need to take care of in order to prepare mushrooms for the winter is containers and equipment for home canning.


Canned food at home is most often made in ordinary glass cans with tin lids. But in recent years, glass jars for harvesting mushrooms for the winter with glass lids, wide rubber rings and clips, especially for home canning, have increasingly appeared on sale. These mushroom canning jars are more convenient to work with and should be recommended first. These two types of cans are handled differently.
Ordinary glass cans for storing mushrooms for future use are available in every farm, their acquisition is not difficult. To seal these cans, tin lids with narrow (rectangular cross-section) rubber rings are used. These caps, complete with rings, are sold at hardware stores.


The rim of the mouth of cans for harvesting mushrooms has a strictly defined diameter (most often 83 mm, but there are also other sizes). The lids are made of exactly the same diameter to ensure complete tightness of the cans. On sale you can find white lids, made of tin-plated tin, and yellow ones, covered with a layer of persistent food grade lacquer on top. Lacquered lids are used to seal sour fruits and berries, as well as marinades. Some foods - preserves, jams or marmalades - can also be sealed with unlacquered (white) lids.

For sealing cans with tin lids, manual seaming machines are used. The machine consists of a steel roller, a chuck, a pressure lever (mushroom) and a handle.
To prepare mushrooms for the winter, you will need the following inventory: a 3-5 liter aluminum or enameled pan for blanching; a sterilizing pan (high), in which you can place 3-4 or more cans, covering it with a lid; slotted spoon, colander, knives, tablespoons and tea spoons, forks - all made of stainless steel.
In addition, for home harvesting of mushrooms, you should have a device for removing cans from a pan, wooden mugs for cans, as well as a thermometer suitable for determining the temperature of water in a pan and canned food in a can during sterilization and when blanching fruits and vegetables.
It is best to use a gas stove for heating.

Glass jars for storing mushrooms for future use should be thoroughly washed and boiled for a few minutes before canning, completely immersed in a large pot of water.
For each type of canned food in jars or bottles of different capacity, the required sterilization duration (in minutes) and temperature (in degrees) are set. Most often, homemade canned food is sterilized at 100 ° C, i.e. in boiling water.
Depending on which cans the canned food is made in, the rules for harvesting mushrooms and the procedure for working are different. Next, you will learn how to prepare mushrooms for the winter in jars with glass lids and in cans with tin lids.
How to properly prepare mushrooms for the winter in jars with glass lids
The filled jars are covered with glass lids so that the rubber ring fits between the lid and the neck of the jar and completely covers the upper (usually grooved) cut of the neck. Using a clamp or a spring, the lids are pressed tightly against the jar. In advance, water is heated in a saucepan to 55-65 ᵒС and sealed jars are placed in this water.
In order to properly prepare mushrooms for the winter, water is taken in such an amount that it covers all the jars with lids (you can measure in advance to what level to pour the water). A wooden grating circle or a piece of cloth is placed on the bottom of the pan under the cans so that when heated, the bottoms of the cans do not come into contact with the bottom of the pan (otherwise, local overheating is possible and then the glass may burst).


Further, when home canning mushrooms, continue to heat the pot with jars and water until the water in the pot boils. The moment the water begins to boil in the pan is considered the beginning of sterilization. From this moment, the cans are kept at a moderate boil for as many minutes as indicated for this type of canned food. Boiling should not be vigorous - this is not necessary, the temperature of the water in the pot will not rise anyway. During sterilization when preserving mushrooms at home, the pan should be covered with a lid so that there is less heat loss and so that vapors do not escape into the room.
With this sterilization, fruits and vegetables in jars are heated by the water in the pan, and the microbes in them die. If the pressure rises in the jar during heating as a result of expansion of the liquid and the formation of vapors, the lid will slightly rise. At the same time, excess vapors and air remaining there will be squeezed out into the resulting gap from the can, after which the lid will again fall into place under the action of the clamp, and water from the pan will not get into the can.
After the time required for sterilization has elapsed, the jars are taken out of the water and, without removing the clamps, are placed for gradual cooling in air, or they are carefully cooled with water. At the same time, so that the cans do not burst during water cooling, they are first immersed in moderately warm water, and then, after a slight decrease in the temperature of the contents, they are rearranged into colder water.
You cannot remove the clamps from hot cans when preserving mushrooms at home. During the cooling of the jars, the glass lids stick tightly to them - then the clamps can be removed and the canned food can be stored. The lids are held onto the cans because a rarefied space (vacuum) forms in the cans. To open such a jar, it is necessary with a knife to slightly press inward on one side of the rubber ring (or, if there is a tongue on the ring, pull on it and pull out the ring slightly). Then the outside air will enter the jar - and the lid will open by itself.
Jars with glass lids are most convenient for home canning: no devices (except for a spring) are required to seal and open them.
Canning mushrooms for the winter at home in cans with tin lids
To preserve mushrooms for the winter in glass jars with tin lids, they are first filled in the same way as described above. Then the cans are only covered with tin lids, and not rolled up and placed for sterilization in a pan with heated water (on a wooden lattice circle or a piece of cloth), but in such a way that the water, after installing all the cans, does not reach the lids by 1.5-2 cm.
After that, the cans continue to be heated until the water begins to boil in the pan and stand for the prescribed number of minutes at a moderate temperature regime.
At the end of sterilization, the jars are carefully removed from the pan, without opening their lids (for this it is better to use special devices so as not to burn yourself). The removed cans are placed on the table and immediately sealed with lids using a seaming machine.

The sealed cans are left upside down for cooling, with the lids down.This is done in order to additionally sterilize the lids with the hot contents of the cans. In addition, if the seaming was done incorrectly, a leak will immediately be found in an inverted can.
Thus, in glass jars with tin lids, canned food is first sterilized, and then the jars are sealed. If you first seal the cans, and then put them in a saucepan with water and heat it to a boil, then an increased pressure is generated from the expansion of air and vapors, as a result of which the lids will be torn off the cans, that is, all the work done will be nullified, and the food will be spoiled.
Harvesting salted mushrooms: salting in an oak tub
Salting mushrooms at home is a whole science. This process was described in detail by a great connoisseur of Russian nature, writer V. Soloukhin in his book "Gifts of Nature", observing the process of pickling mushrooms by Pavel Ivanovich Kositsyn, who worked as a forester for many years.

Before you salt the mushrooms for the winter, the oak tub must be thoroughly rinsed. Put juniper branches in it, and scald these branches with boiling water so that their spirit permeates the wood of the tub. Then it is covered with a cotton blanket to keep the juniper vapor from escaping. Raising the blanket, they throw a very hot stone into the tub. The water hisses and hums dully under the covers, and a new portion of the juniper scent is absorbed by the tub. However, it is not only about the juniper aroma, which, probably, could be dispensed with. But in this way disinfection is carried out, and this is a guarantee that the mushrooms will not turn sour in winter and will not begin to grow moldy.

So, the oak tub for pickling mushrooms is ready, now mushrooms or other gifts of the forest must be carefully wiped off the ground and debris with a rag. Lay dry mushrooms in rows and layers so that each layer is half a quarter thick. The laid mushrooms are sprinkled with seasonings: dill, currant leaves, horseradish leaves, oak leaves, cherry leaves. Of course, you can put caraway seeds, and in general everything that can give its own special taste. So when harvesting salted mushrooms, lay layer by layer until the tub is full.
On top of the mushrooms, you need to put a gauze bag filled with salt, spread it evenly over the entire surface. On this bag put a wooden, cleanly washed circle, and on the circle it is oppressed, most often an ordinary river stone. After a while, the circle and the stone will begin to descend, and on top of them will appear abundant mushroom juice, which Pavel Ivanovich recommends to scoop out from time to time.
After two months, you can eat the mushrooms. That is, what does "you can eat" mean? With home-salted mushrooms, you can eat them the next day. But in two months the gifts of the forest will be salted, take in all possible shades of aroma and taste and become what the culinary specialist wanted to see them.
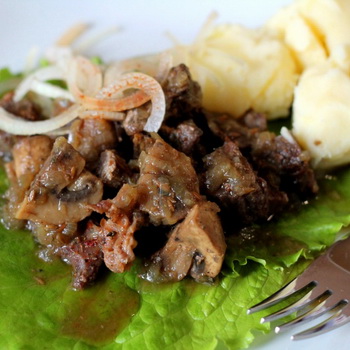
Needless to say, mushrooms salted in this way are unlikely to leave anyone indifferent, especially in winter, and with hot boiled potatoes! Almost all types of lamellar mushrooms can be salted.
Some also salt porcini mushrooms, but it is better not to do this, because each mushroom has its own purpose.
How to salt mushrooms for the winter at home: salting in jars and barrels
How else can you salt mushrooms at home to make an excellent preparation for the winter?
As a rule, the most often used cold salting method, that is, without preliminary heat treatment of mushrooms. Salting mushrooms in this way is not at all difficult.


Oak barrels, glass and clay jars with a wide mouth are suitable as containers for salting mushrooms.
Before salting mushrooms for the winter in jars or barrels, first of all, mushrooms prepared for salting (washed and peeled) must be soaked in cold, slightly salted water so that there is no bitterness left in them. It takes two to five days to soak any mushrooms. It all depends on their type. So, mushrooms are not soaked at all, and valui and milk mushrooms must be kept in water for 3-5 days.And yet, do not forget to change the water three times a day while soaking before salt the mushrooms in the barrel.
For salting 10 kg of mushrooms, about 250-300 g of salt is required, 2-3 g of allspice, bay leaf each (if you wish, you can put garlic, currant leaves, cloves, dill and other spices in the mushrooms to your taste).
Place the mushrooms in containers with their caps down. Each layer (5-7 cm) is sprinkled with salt.
Spices are usually placed on the bottom of the container and on top of the mushrooms, but they can also be placed between each layer, especially when it comes to dill, leaves of fruit trees and bushes.
The mushrooms laid in this way are covered with a wooden lid on top, on which the oppression is placed.
Usually in a day or two, brine appears abundantly. The excess must be drained. This is done until the mushrooms finally settle. The absence of brine indicates that it is necessary to increase the oppression.
With this method of salting, mushrooms can be eaten after 2-3 days, milk mushrooms - after a month, waves - after one and a half, and valuei - after 2 months.
Salted mushrooms are stored in a cool place at temperatures up to +8 C, but not below 0 ° C.
For 1 kg of mushrooms, take 1/3 cup of water, 2/3 cup of vinegar, 1 tbsp. a spoonful of salt, 1 teaspoon of sugar, allspice, cinnamon, cloves, bay leaves and other spices to taste.

Pour water, vinegar, salt into an enamel pot. After the water boils, the prepared (washed and peeled) mushrooms are laid and again, bringing to a boil, they are boiled over low heat for 10 to 30 minutes. The cooking time depends on the density of the mushroom pulp.
Copious foam builds up in the pan during cooking. It should be removed periodically. When the release of foam stops and the mushrooms begin to settle to the bottom of the pan, the boiling ends. Shortly before the end of cooking, salt and spices are added to the marinade.

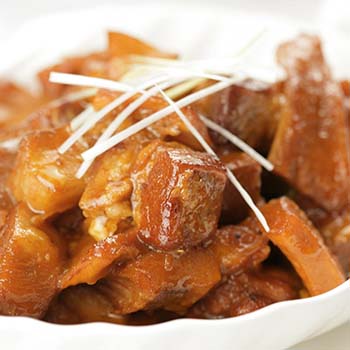
Ready mushrooms are quickly cooled, placed in jars and poured to the top with cooled marinade. A properly cooked marinade is usually translucent, clean, and slightly stringy.
Pickled boletus is especially good.
Least of all boletus, boletus and porcini mushrooms are suitable for pickling, since during cooking their caps are boiled, which makes the marinade clogged and cloudy.
How to properly dry mushrooms at home
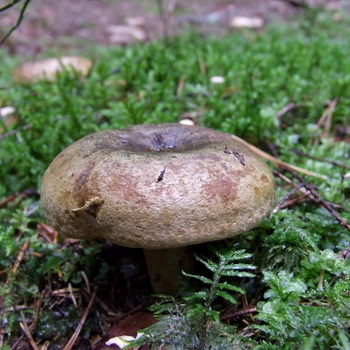
The easiest way to harvest mushrooms is drying: any mushrooms can be dried, but they prefer strong boletus (porcini mushrooms), boletus and boletus boletus, boletus, morels and stitches. Lamellar mushrooms are least suitable for drying, since the milky juice they contain gives them a bitter taste. By the way, when buying these mushrooms on the market, you need to be very careful - when dried, they are very difficult to distinguish from poisonous ones.
How to properly dry mushrooms so that they do not lose their taste?
Before you dry the mushrooms at home, you do not need to wash them, you will only have to clear the gifts of the forest from earth and litter. The legs are cut at a distance of 1.2-2 cm from the cap. Before drying the mushrooms, they must be dried for 2-3 hours at a temperature of 40-50 ᵒС.


In hot, sunny summers, it is best to dry the mushrooms in the sun. To do this, they are strung on strong threads and hung so that the mushrooms do not touch.
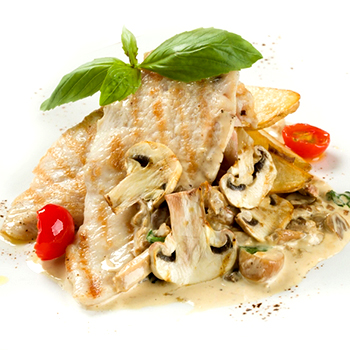
Dried mushrooms are highly hygroscopic, so they must be stored in dry, ventilated places. In cooking, dried mushrooms can hardly be overestimated. Any 2-3 fungi added to meat or fish dishes, sauce or porridge can make this dish aromatic and very tasty. With only 1 kilogram of dried mushrooms, you will be able to treat your loved ones with the most delicious dishes for a whole year.